
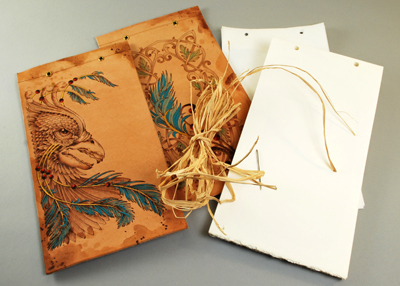
Binding the Leather Journal
 1. Cut the leather into two pieces and bevel the edges on both sides of the leather. There is a specialty tool in leather crafting for beveling but you may also use a fingernail cuticle remover.
2. Trace your pattern onto the leather and wood burn the design following the directions for the feathered griffin.
3. Measure ¾” from the top of each leather piece, front and back. With the blunt side of a knife score along this line to create a fold line. If you soak the leather in water for a few moments first the score line, fold line, will be more defined.
4. On both the front and back, measure in 1 ¾” from each side of the leather along the fold line and mark the points for your rivet holes. The center of each hole is 3” apart from the other hole. With a hole punch make a hole at the points. Set the rivets into the holes. Rivets are not necessary to the construction of this artist’s sketch book but do add some strength as well as a small accents.
5. Watercolor papers and illustration papers are available in very large sheets that usually measure about 22” wide by 30” long. Many papers include a deckle edge on the two long sides.
6. Cut two sheets of watercolor paper into 6“ wide by 28” long strips leaving the deckle edging on both of the width edges. You will have approximately 10 strips.
7. Measure 11” from the narrow edge of the paper to find the middle line point, mark this line with a pencil. Using a ruler and the blunt side of a knife score along the line to create a fold line. Fold each strip along the fold line. One folded strip creates two sheets of paper – four pages counting fronts and backs.
8. Cut 22 sheets of tracing paper 6” wide by 11” long. These sheets will be placed between each page of the watercolor paper and will protect your artwork from dirt, smudges and smears.
9. Each sheet of tracing paper and each folded strip of watercolor paper needs two holes punched ½” from the top edge and 1 ½” in from the side to correspond with the rivet holes in the front and back leather covers.
10. Arrange the papers with one sheet of tracing paper on top, then one sheet of watercolor paper, alternating the two types of paper ending with one sheet of tracing paper.
11. Use scrap paper to wrap the pages together, taping the scrap paper into place. Working the pages as one unit will be easier than trying to work individual papers during the lacing process.
| 12. Select three to four lengths of raffia, each about 40” to 48” long. Wet the raffia before use, and set aside as your laces. Select two short lengths of raffia, wet, and thread through a large eyed needle. Thread the needle through the rivet hole on the front leather cover then through all of the paper pages and finally through the rivet hole on the back cover. Tie this raffia into a simple square knot. Repeat for the second rivet hole working through all layers. These two threads are temporary and used to secure your book during the lacing process. | 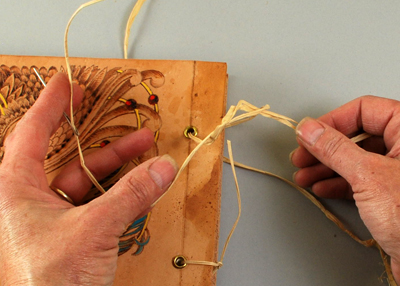 |
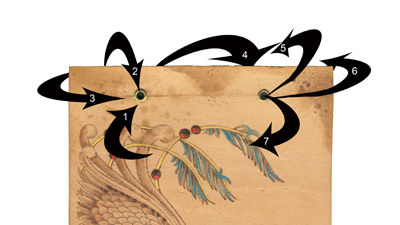
| 13. Using the lacing raffia, thread three to four pieces through a large eyed needle. For the first side of your artist’s sketch book you will be passing the needle through the rivet hole from front to back. Work the needle through the rivet hole and pull the raffia to the back of your book. Let at least 12” of raffia on the front side to be used as your finishing bow at the end of the lacing. | 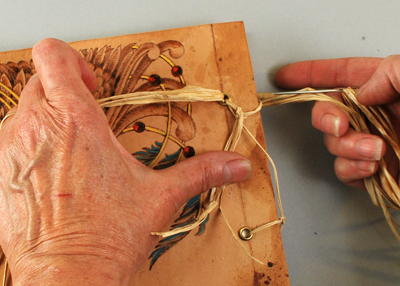 |
| 14. Bring the raffia across the top of the book and thread the needle through the rivet hole. Put the raffia tight across the top edge of your book. |  |
| 15. Thread the needle through the rivet hole to the back of the book, laying the raffia loop along the side of the leather cover. Pull the raffia tight. | 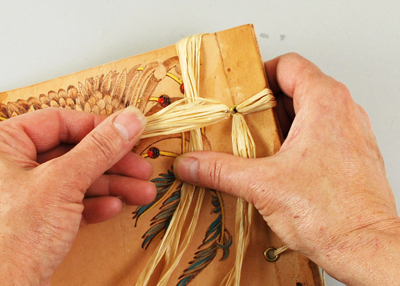 |
| 16. Turn the book over so that you are now working on the back cover side. Thread the needle into the second rivet hole working from the back to the front of your book. Pull the raffia tight. | 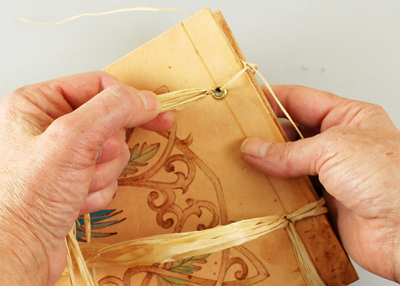 |
| 17. Bring the raffia over the top edge of the book and thread the needle through the rivet hole. Pull the raffia tight. | 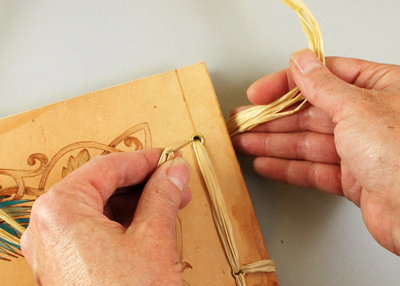 |
| 18. Loop the raffia along the side of the book and thread the needle through the rivet hole. Pull the raffia tight. | 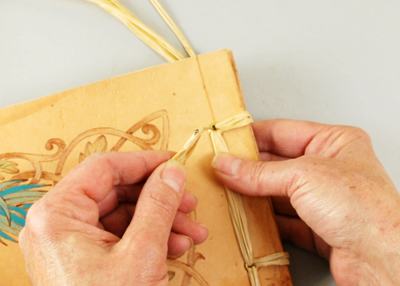 |
| 19. Both ends of the raffia are now on the front side of the book. The back side is complete in the lacing. Cut and remove the two small raffia threads that were used in step 12 to hold the book together during lacing. | 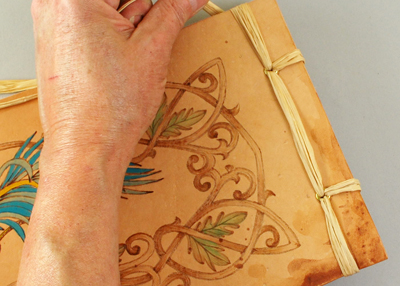 |
| 20. Working on the front side of your book, tie the two ends of the raffia into a simple square knot. Create a bow with the two raffia ends over the square knot. | 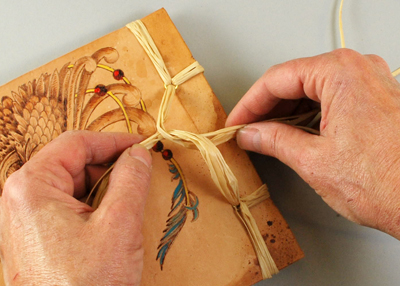 |
| 21. Trim the excess ends of your raffia bow. Clip and remove the raffia holding strings. | 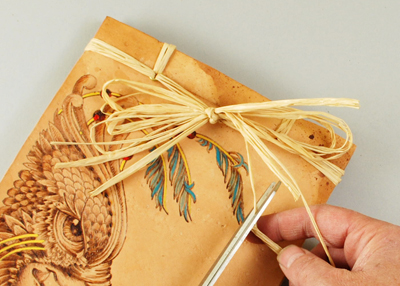 |
 Lacing Diagram
